After spending a bit more time testing various software to generate 3d landscapes I wanted to write up a second post with more detail and showing off another data set I collected the other day while hiking around Donner Lake area near Lake Tahoe.
First part of the post can be found here.
Let me first talk about my setup more in detail.
About a 2 1/2 years ago I started playing around with drones from the small cheap $50 ones to eventually shelling out and buying a DJI Phantom 2 which then I added on various components.
- DJI Phantom 2
- DJI iPad Ground Station
- iOSD Mini
- Immersion RC 600mW 5.8Ghz
- FlySight 32 Channel Black Pearl 5.8Ghz Monitor
- GoPro 4
- Some other misc mounts and adapters.
Here is a shot of both of my birds before doing a shoot at Emerald Bay in Lake Tahoe.
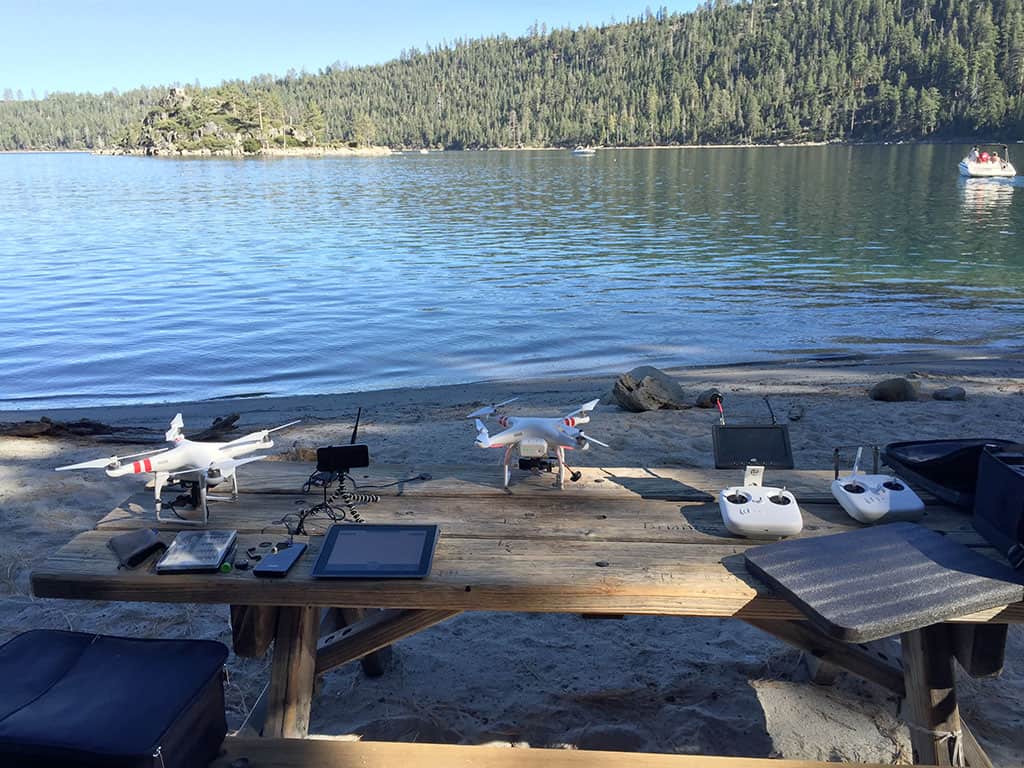
Setting up the Phantoms for flight
So as mentioned in my first post I had been trying out Pix4D application which has some nice features but its quite expensive. I also recently ran across recently Agisoft Photoscan which has some similar features to Pix4D and is a little less expensive if you buy the standard edition. I guess it would depend on what you want to do with each software and Ill mention the pro’s and cons later in this article but both give you a trial version which you can test out for yourself.
So the first thing you want to do is find your location where you want to fly. Check the height of the tallest building, tree or what ever is around you. Then figure out your plan of attack for flying in a grid pattern around the locations you want scan.
My first attempt I went to the local beach here in Tahoe City and setup my iPad ground station which comes with a grid flight pattern which I recommend you use. You can scale the grid up or down and rotate it based upon the flight path you want to take. I recommend reading though this post on the Pix4D web site on building your flight plan for what your wanting to do.
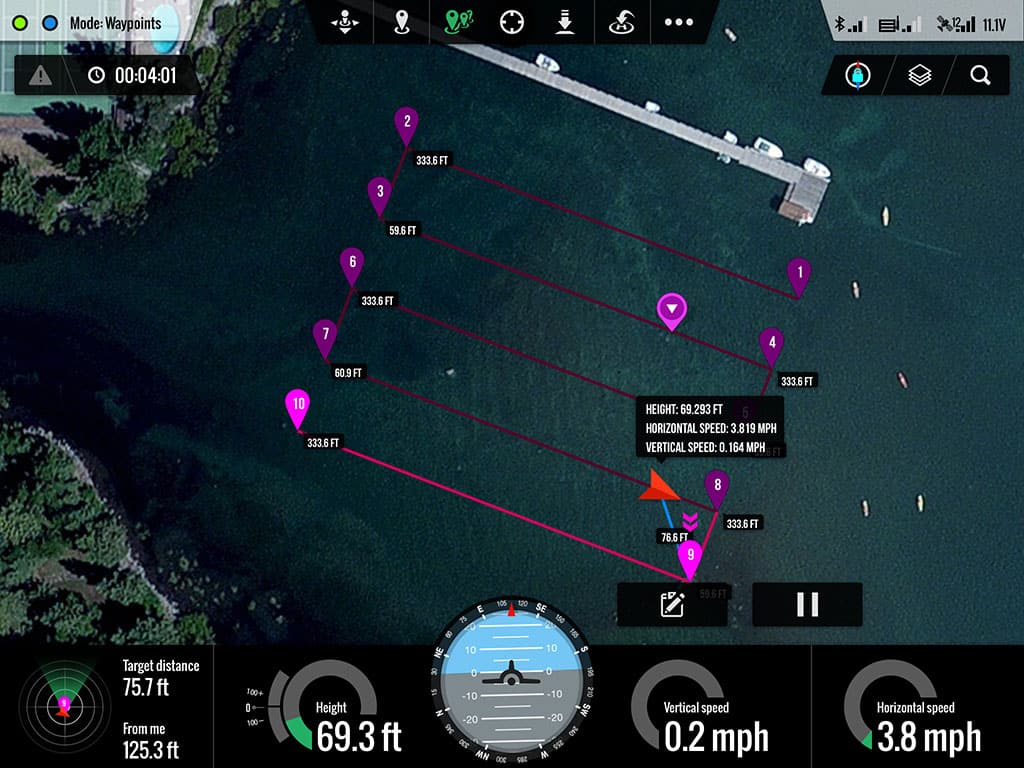
My iPad Ground settings from way point to way point usually is the following.
- Speed 3-5 mph, this depends on the area your covering and then your photo capture settings.
- Always check to make sure the estimated flight time is less than 10-13 minutes, esp if your using one fully charged battery.
- Height can vary but I usually go up anywhere from 70-120 feet, this depends on the clearance of objects in the way.
GoPro Settings
- I set the camera mode to photo timelapse and set the duration to take a picture every 2 seconds.
- Its important to make sure you have enough overlap from photo to photo since the software finds similarities and then aligns the photos to build the landscape.
- Point the camera directly down when flying
Now the only thing to do is turn everything on, do your pre flight checks and hit the go button on the ground station. (maybe cross your fingers as well) 🙂
After your done you will end up with around 100-200+ photos depending on the flight plan. These photos are then pulled into the software and processed into point cloud data.
From their you can then generate the Digital Elevation Model (DEM). Both software packages have similar work flows and you can find plenty of tutorials on both sites or on Youtube.
Below is a gallery from my first test with both software packages from a data set from a beach location near me.
-

- Photoscan
-
- Pix4D
You can see that the results are pretty similar. I tried to take a screen shot from the same camera location in the app to show you any differences in the models.
Honestly I’m not sure what model I would choose but one of the things that has pushed me to using Photoscan more than Pix4D is because they are cross platform and I mainly use my Mac on a daily basis. I actually had to build a windows 7 box in order to do my Pix4D tests.
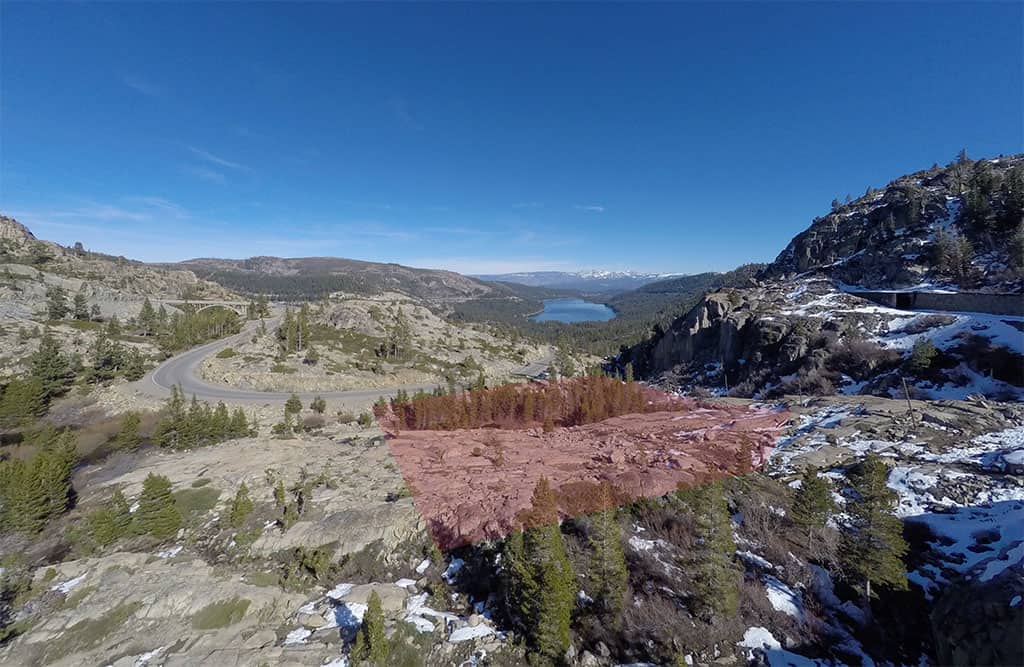
Recently I went out to shoot some aerial video around Donner Lake near Lake Tahoe. I wanted to also do another test with aerial photos and not as flat of a terrain as the picture set from above. I ran though the same set up as listed above and let the drone fly its course. When I got home I process the same data set in both applications which you can see below.
-
- General Area Scanned
-
- Pix4d Camera Path
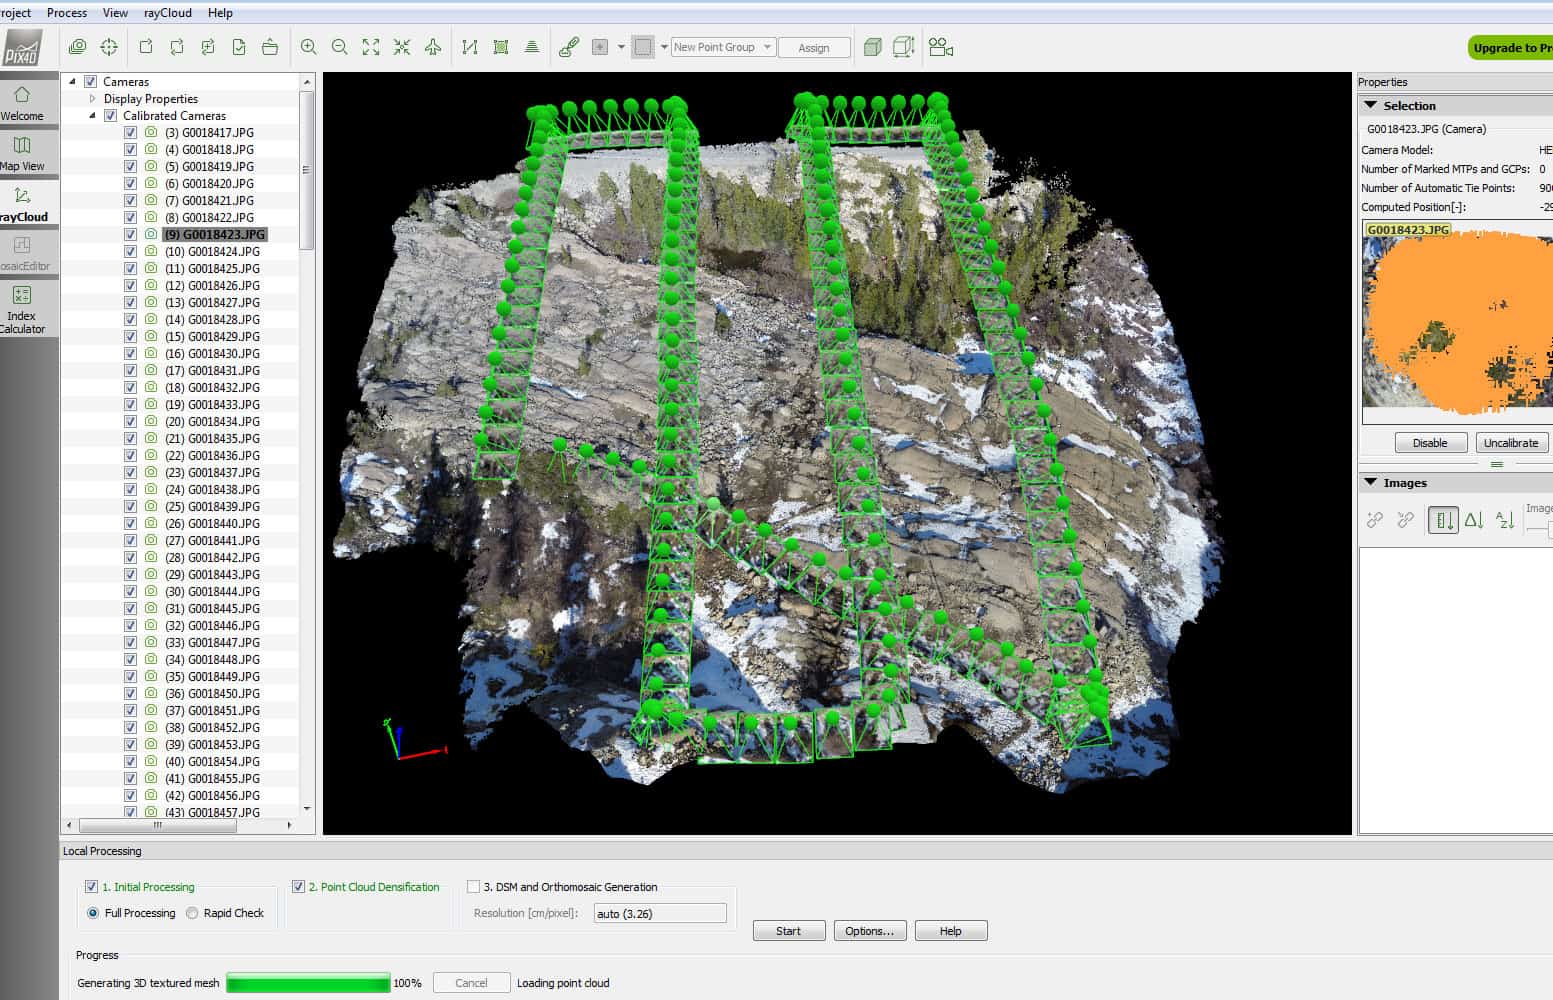
-
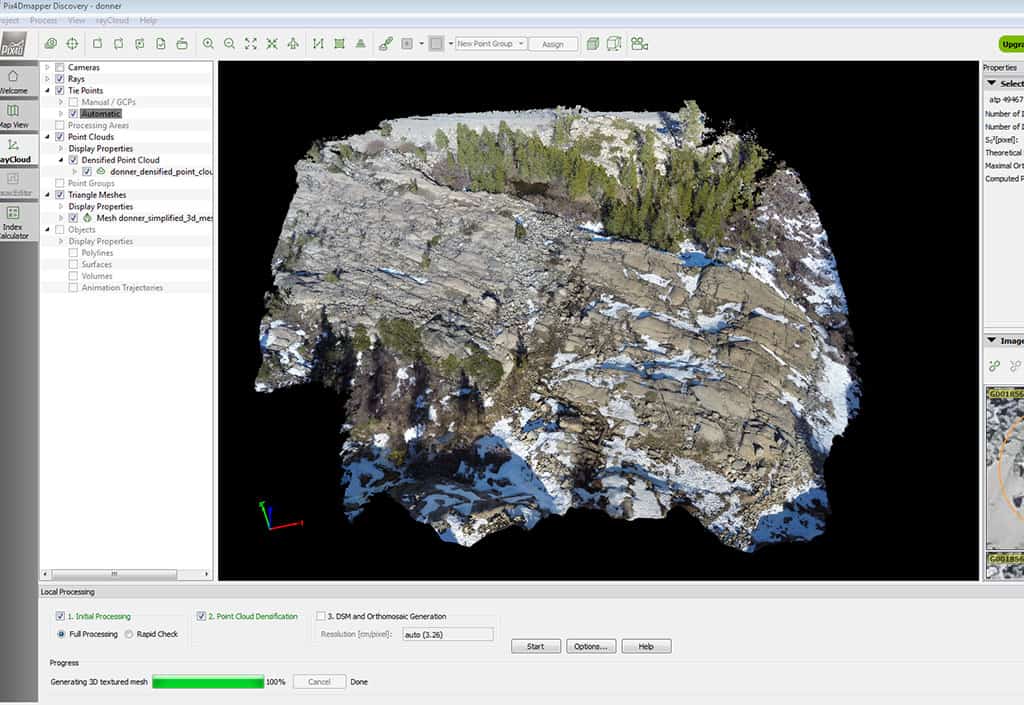
- Pix4d 3d landscape
-
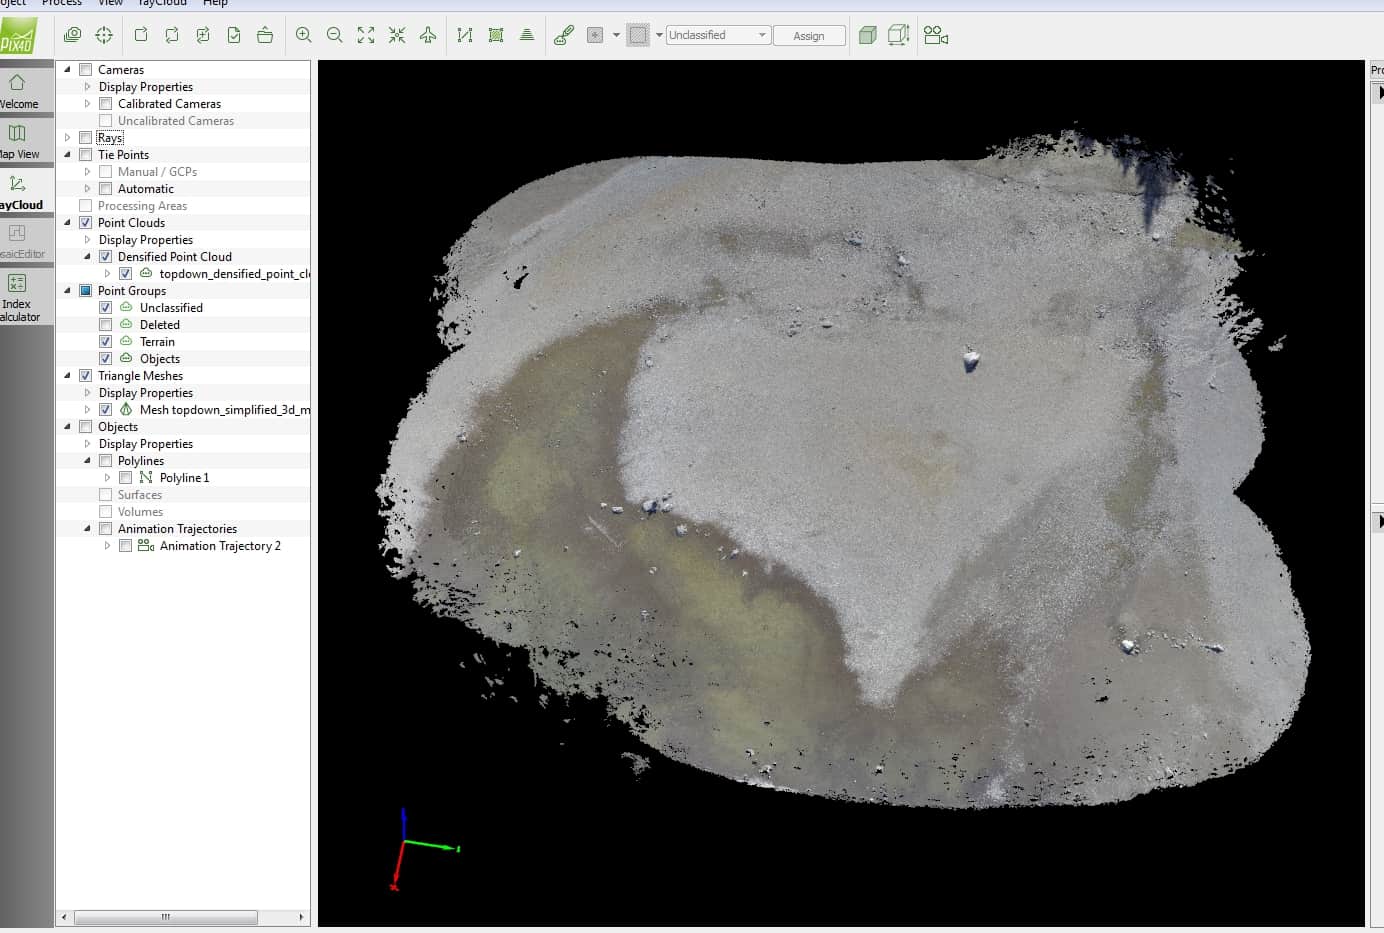
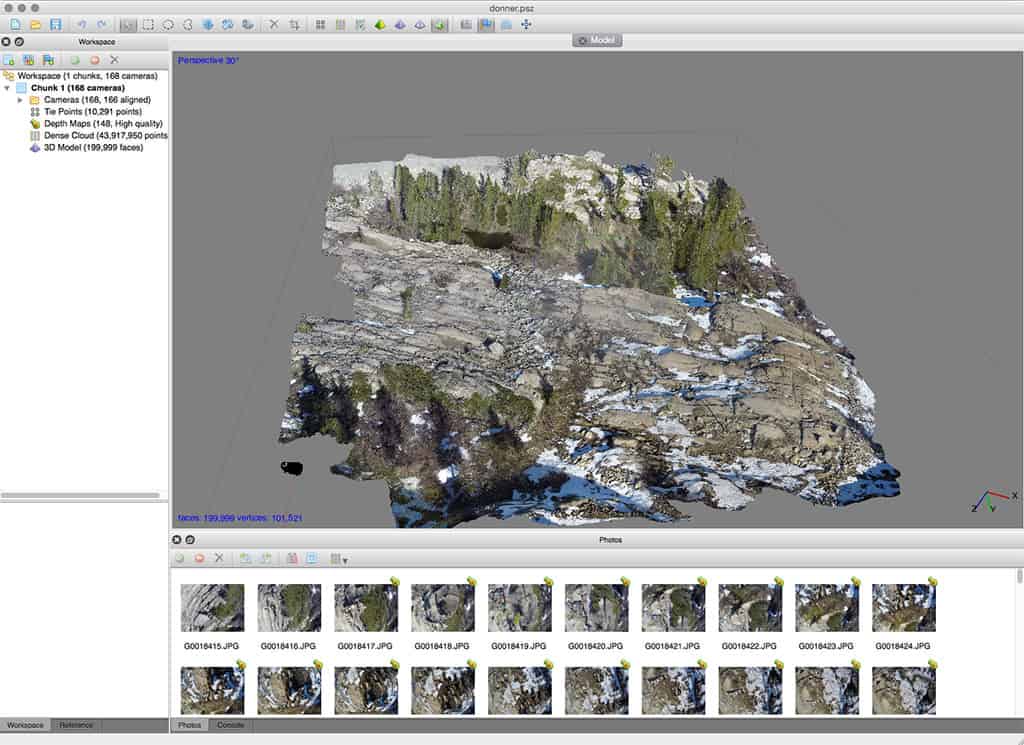
- Photoscan Camera Path

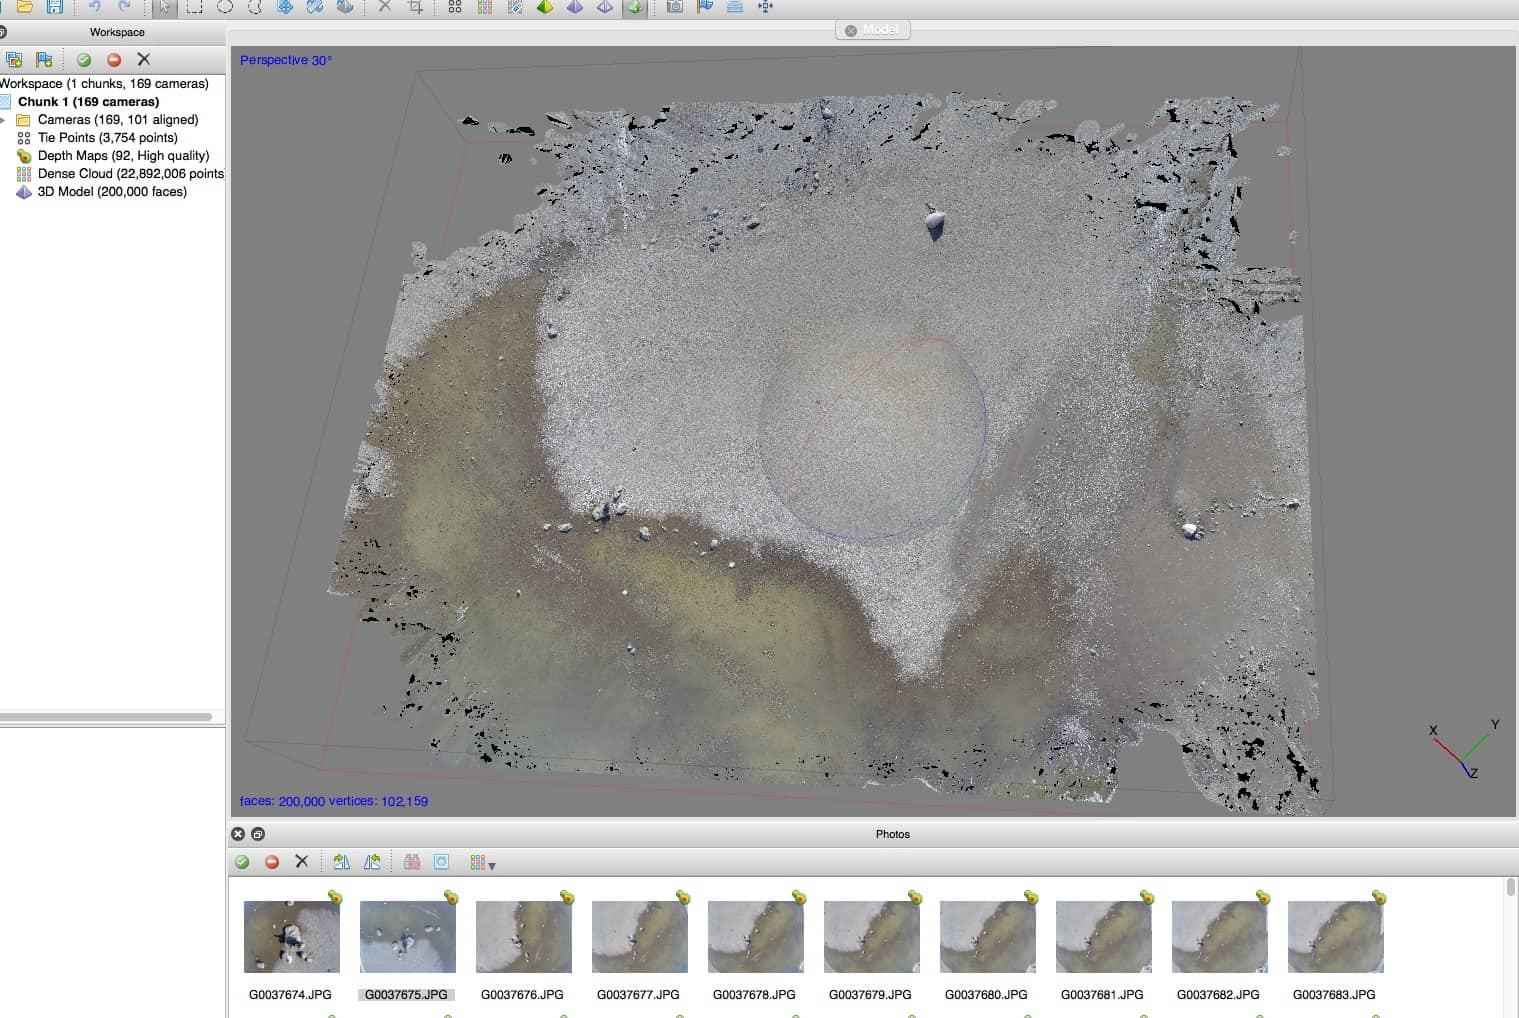
-
- Photoscan 3d landscape
As you can see they both seem to do a great job of turning my data into 3d landscapes (DEM’s).
As a tech head who has been developing video games for almost 20 years and worked as a 3d modeler to level designing and beyond I have to say I’m quite impressed with the results I’m getting on my limited testing so far.
So my opinion is both software packages are great and Pix4d from what I can tell has a lot more options for outputting data and even elevation heat style maps, I think they call them Index maps and also they generate a nice PDF report for you that you could potentially give to the ground land survey team. One thing missing from Photoscan is the ability to create a 3d camera fly though of your landscape or around an object you want to showcase. I think this is a great feature to have since I would have to export the model into a 3d package then create a camera fly though normally.
So for what I do Photoscan serves all my needs tho but I wish they had the camera fly though options. I do have the skills to bring the 3d object into Maya and create the fly though if I need them but its an extra step. As mentioned above the thing I didn’t like about Pix4D was the fact that I have to have a windows box, and I cannot run it as a VM image on my mac since it requires 3d card acceleration to help generate the data.
As I play around more with Photoscan I hope to do a more in-depth post or video of the features when I get time but for now here is the end result 3d model of the Donner Lake landscape.. Enjoy!
Or if you want to view it in full screen go here. Please leave any feedback or comments below.
Quick fly though video created by Pix4D output